This One Is A Must See... Huge Transformation in Pacific Pines
- Cory Grant

- Aug 15, 2022
- 3 min read
Updated: May 26, 2023
I initially met with the super nice homeowners at this property early in the year. At the time, there was a dark and horrible, covered patio area, a messy path leading to nowhere at the side of the house an overgrown garden that was an eyesore and a pool area that was quite unusable.
They were not quite sure how to attack it as they had inherited the yard from the previous owner. He was clearly a weekend warrior who had just picked up whatever materials he could get for cheap and thrown them together. it really was a case of “The house that Jack built 😬”.
There was hope though. The rear property had a beautiful view and if it could be terraced nicely, it would be a great yard.
After a lot of conversation and pulling together resources and contacts, a cunning plan started to form…
THE SCOPE
The main patio area was unusable as it had a massive lean on it, so much so that your milk would run out of your cereal bowl if you’re having breakfast out there 🤯.
The existing pergola needed removing as it was rotten and falling down. A retaining wall and new patio needed constructing.
A new path leading from the front to the rear also needed constructing so it tied the front and rear together.
The pool area had a shed and pergola thing removed.
Retaining walls needed to be built so the pool area could be extended. New concrete was then added.
The pathway leading from the top patio area to the lower pool area needed to be fixed and steps constructed.
All the new and existing concrete needed to look the same, so all was resurfaced to match.
The front driveway as a side project also was to be extended allowing for a much larger and user-friendly entrance.
It was a really big project with a lot of parts. Let’s get into it… 🥵🥵🥵
THE EXECUTION
Step 1:
STRUCTURE REMOVAL
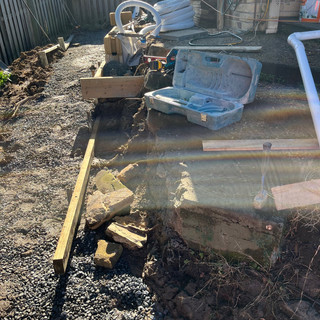
Before any concrete works could begin, the existing structures needed removing. This was arranged by a third party.

Step 2:
RETAINING WALLS
Ken rolled in at this stage and built retaining walls to the top and bottom patio areas. This enabled both areas to be extended and now be ready for concrete to be added.
Many loads of waste and overgrown greenery was also removed at this stage.

Step 3:
CONCRETE WORKS
Now that we had a clear area to work with, the concrete works could begin.
Some demolition was still to be done to the pool area. Sections needed removing and cutting out that were too damaged, plus electrical wiring needed re-routing.
The sloping top patio area was able to be poured on top of, saving on the removal of that.
All other areas were excavated and prepared. Exiting concrete was dowelled into, reinforcing was set and concrete was placed on the new falls. All expansion cutting followed.
At this stage, even though the spaces were now usable it was still an eyesore with all the different sections of concrete.
Step 4:
RESURFACING
After enough time had passed for the concrete to cure, we returned to resurface the pool area, patio and paths.
The new and existing concrete was prepared, any cracks epoxied and an initial base coating was applied to even out any texture differences between surfaces.

A 600mm approximate tile finish with a black grout line was decided on. The black was chosen so that the many cuts tying the different sections of concrete could be worked into the pattern, helping disguise them.

Colours for the tile itself were chosen to work with the brick colour of the house.
Once textured, all the concrete was cleaned up, all sealing was done then a thorough site clean was completed.
THE END RESULT
The homeowners were delighted with the transformation… so were the team here at OSM.
To do Decorative Concrete Right, takes experience, planning and knowledge of concrete and related products. We would love to hear from you to talk about your project.
Cory Grant


Comments